When time is tight, it can be challenging to prepare a meal that’s both nutritious and satisfying for the whole family. I like to do an advance preparation at the weekend and have food ready for 2 days in advance, paked in lunch boxewx for me and the whole family. However, during the week while we are all busy with work and school activities it is a good idea to have a few menu ideas beforehand. It is quick and easy to just pop -up to the local supermarket and get the products we need in order to prepare a fast and healthy dinner for whole family. Therefore, I am here to help you with these three quick and healthy dinner ideas that could please everyone at the table:
1. One-Pan Baked Lemon Garlic Salmon with VegetablesIngredients:
4 salmon fillets
1 lb (450g) baby potatoes, halved
1 lb (450g) asparagus, trimmed
2 tablespoons olive oil
3 cloves garlic, minced
1 lemon, sliced thinly
1 teaspoon dried oregano
Salt and pepper to taste
Fresh parsley for garnish
Instructions:
Preheat the oven to 400°F (200°C). Line a large baking sheet with parchment paper.
Toss the baby potatoes with half of the olive oil, minced garlic, oregano, salt, and pepper. Spread them out on one side of the baking sheet and roast for 15 minutes.
Remove the baking sheet from the oven and add the salmon fillets and asparagus to the other side. Drizzle with the remaining olive oil, and season with salt, pepper, and lemon slices.
Return to the oven and bake for an additional 12-15 minutes, until the salmon is cooked through and the vegetables are tender.
Garnish with fresh parsley and serve.
Why It’s Healthy: This meal is rich in omega-3 fatty acids from the salmon, which are great for heart health. The variety of vegetables provides fiber, vitamins, and minerals, and it’s all prepared in one pan for easy cleanup.: This stir-fry is a great way to pack in a variety of colorful vegetables, offering plenty of vitamins, minerals, and fiber. Tofu adds plant-based protein, and using whole grains like brown rice or quinoa makes it a balanced meal.
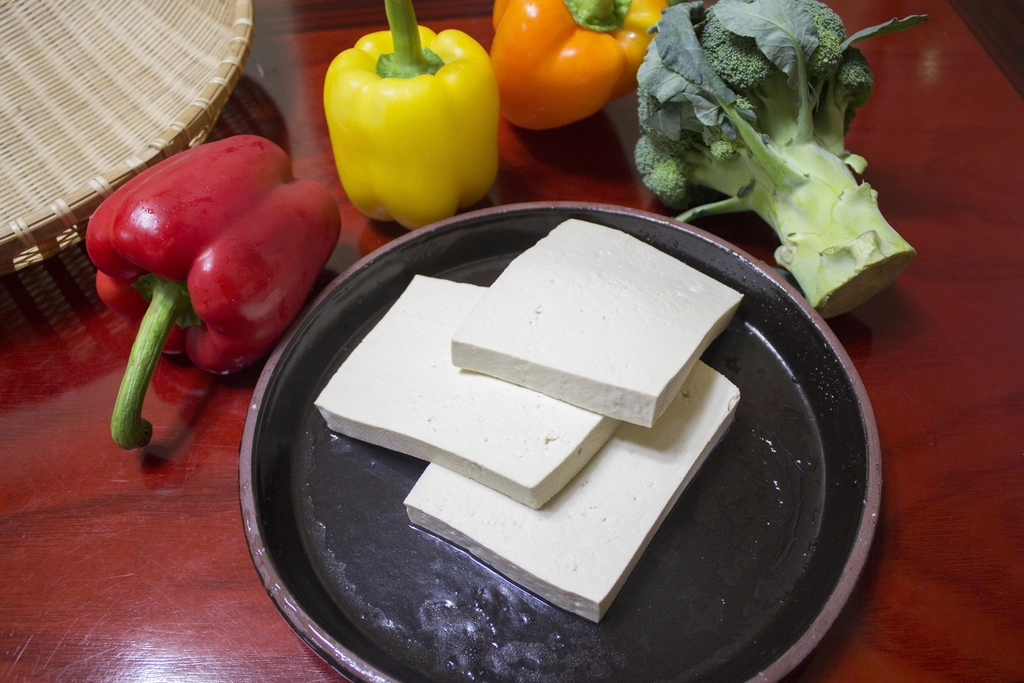
2. Vegetable Stir-Fry with Tofu
Ingredients:
1 block (14 oz) firm tofu, drained and cubed
2 tablespoons soy sauce or tamari (for gluten-free)
1 tablespoon sesame oil
2 tablespoons olive oil
1 red bell pepper, sliced
1 broccoli head, cut into florets
2 carrots, julienned
1 cup snap peas
3 cloves garlic, minced
1 tablespoon fresh ginger, minced
1/4 cup low-sodium soy sauce or tamari
1 tablespoon honey or maple syrup
1 tablespoon rice vinegar
Cooked brown rice or quinoa for serving
Sesame seeds and green onions for garnish
Instructions:
Marinate the tofu cubes in soy sauce (or tamari) and sesame oil for at least 10 minutes. If you are realy in a hurry and would like to speed your diner preparation look at the option to add to your kitchen The new Nindja Speedi10 in 1 Rapid Cooker which is now on a offer sold for only £149.92 – 35% from its original price. Air Fryer is one essential gadjet in every family’s kitchen. It will make your lifes so much easier and will help you cook many healthy meals.
Heat olive oil in a large skillet or wok over medium-high heat. Add the marinated tofu and cook until golden and crispy, about 5-7 minutes. Remove tofu and set aside.
In the same skillet, add garlic and ginger, cooking until fragrant. Add bell pepper, broccoli, carrots, and snap peas, and stir-fry for 5-7 minutes, until vegetables are tender but still crisp.
Return the tofu to the skillet and add the remaining soy sauce, honey, and rice vinegar. Stir everything together and cook for another 2 minutes.
Serve the stir-fry over brown rice or quinoa, garnished with sesame seeds and green onions.
: This stir-fry is a great way to pack in a variety of colorful vegetables, offering plenty of vitamins, minerals, and fiber. Tofu adds plant-based protein, and using whole grains like brown rice or quinoa makes it a balanced meal.
3. Turkey and Veggie Lettuce Wraps
Ingredients:
1 lb (450g) ground turkey
1 tablespoon olive oil
1 onion, finely chopped
2 cloves garlic, minced
1 red bell pepper, diced
1 zucchini, diced
1 tablespoon soy sauce or tamari
1 tablespoon hoisin sauce
1 teaspoon rice vinegar
1 teaspoon sesame oil
Large lettuce leaves (like romaine or butter lettuce)
Shredded carrots and sliced green onions for garnish
Instructions:
Heat olive oil in a large skillet over medium heat. Add onion and garlic, cooking until softened.
Add the ground turkey, breaking it up with a spoon, and cook until browned and fully cooked.
Stir in the diced bell pepper and zucchini, and cook for another 5 minutes until the vegetables are tender.
Add soy sauce, hoisin sauce, rice vinegar, and sesame oil, stirring to combine. Cook for another 2-3 minutes until everything is heated through.
Spoon the turkey and veggie mixture into lettuce leaves, and garnish with shredded carrots and green onions. Serve with additional hoisin sauce on the side if desired.
Why It’s Healthy: These lettuce wraps are low in carbs and high in protein, making them a light yet filling option. The variety of vegetables adds fiber and nutrients, and the lettuce wraps are a fun, hands-on meal that the whole family can enjoy.
In today’s fast-paced world, the convenience of takeout or pre-packaged meals often trumps the idea of cooking at home. However, if you’re looking to lose weight, preparing your own meals might be one of the most effective steps you can take.
Home cooking isn’t just about making food—it’s about reclaiming control over what goes into your body, which can make a huge difference in your weight loss journey. In this post I am including a full guide on how of the process to start preparing your own food. This guide will also help you including the home made meals prep in your busy scheudle and daily routine,in a balanced way. Cooking your own meals can help you shed few extra pounds and could be the beginning of a pleasent healthy eating journey.
I will start with 8 reasons to start preparing your own food at home:
1. Full Control Over Ingredients
When you cook at home, you have complete control over the ingredients that go into your meals. Many restaurant dishes and packaged foods contain hidden sugars, unhealthy fats, and high levels of sodium, all of which can contribute to weight gain. By preparing your meals, you can choose whole, nutrient-dense ingredients, reduce unnecessary additives, and adjust flavors to suit your taste without compromising your health.
2. Manage Portion Sizes Effectively
One of the biggest contributors to weight gain is overeating, and it’s easy to consume more than you need when dining out or ordering in. Restaurants often serve oversized portions that exceed daily calorie needs. At home, you can portion your meals according to your goals, ensuring that you’re eating the right amount. Using smaller plates, measuring portions, and being mindful while eating can help prevent overeating and promote weight loss.
3. Make Healthier Substitutions
When you prepare food at home, you have the flexibility to make healthier ingredient swaps. Instead of using refined flour, you can opt for whole grain alternatives. You can replace sugar with natural sweeteners like honey or stevia, use lean proteins, and add extra vegetables to every dish. These small changes add up over time, significantly cutting down on calories while still keeping meals satisfying and delicious.
4. Encourages Mindful Eating
Cooking your meals allows you to develop a stronger connection to the food you eat. The process of preparing and cooking food can be a mindful activity that makes you more aware of what you’re putting into your body. This awareness can help you slow down, savor each bite, and recognize when you’re full—key elements in preventing overeating and supporting healthy digestion.
5. Builds Healthy Eating Habits
Consistently preparing your meals at home can help establish a routine that supports healthy eating habits. As you become more familiar with cooking, you’ll naturally gravitate towards whole foods, such as fruits, vegetables, lean proteins, and whole grains, which are vital for weight loss. Over time, these healthy choices become a habit, making it easier to stick to a balanced diet.
6. Reduces Temptation and Impulsive Eating
When you cook at home, you’re less likely to be tempted by high-calorie, unhealthy foods. The convenience of fast food and takeout often leads to impulsive eating, especially after a long day. By planning and preparing meals at home, you’re more likely to stick to your diet plan and avoid the temptation of calorie-laden restaurant options or convenience foods.
7. Saves Money, Encouraging Healthier Choices
Preparing your meals can also save you money, which can be a powerful motivator for making healthier choices. The cost of dining out or ordering food regularly adds up quickly. Cooking at home allows you to budget more effectively, buy fresh ingredients, and invest in healthier options. The money saved can be used to purchase higher-quality produce, organic options, or special ingredients that make your meals more nutritious and enjoyable.
8. Customizes Meals to Your Nutritional Needs
Everyone has unique nutritional needs, and cooking at home allows you to customize your meals accordingly. Whether you’re on a low-carb, high-protein, or plant-based diet, you can tailor each meal to fit your specific dietary goals. This customization ensures that you’re getting the right nutrients, which is crucial for both weight loss and overall health.
Next steps are to start thinking about the process and plan your first tour to the local shops in order to prepare your weekly menu. Below I am giving you the main steps of how to start cooking at home:
Step-by-Step Guide to Start Cooking at Home for Weight Loss
Cooking at home can seem daunting at first, especially if you’re not used to preparing your own meals regularly. However, with some planning and practice, you can make it an enjoyable and sustainable habit that supports your weight loss goals. This step-by-step guide will help you get started on your journey to home-cooked, healthier eating.
Step 1: Set Clear Goals
Before diving into cooking, take a moment to set clear, realistic goals. Ask yourself:
What are my weight loss goals? Define a specific number of pounds you want to lose or a target weight.
How often do I want to cook at home? Start with a realistic number, like cooking 3-4 times a week, and gradually increase as you become more comfortable.
What dietary preferences or restrictions do I have? Identify if you have any specific dietary needs (e.g., gluten-free, vegan, low-carb) to help plan your meals.
Step 2: Plan Your Meals for the Week
Meal planning is a critical step that helps you stay organized and committed to cooking at home.
Create a Weekly Meal Plan:
Choose a day to plan your meals for the upcoming week. Write down breakfast, lunch, dinner, and snacks.
Focus on including a balance of lean proteins (chicken, fish, tofu), whole grains (brown rice, quinoa), healthy fats (avocado, olive oil), and plenty of vegetables.
Aim to try one new recipe per week to keep things interesting and gradually build your cooking skills.
Use Recipes as a Guide:
Start with simple recipes that have 5-10 ingredients and straightforward instructions.
Look for recipes that align with your weight loss goals, such as those that are low in calories, high in protein, or rich in fiber.
Save your favorite recipes for future use, and create a small repertoire of go-to meals.
Step 3: Make a Shopping List
Once your meal plan is ready, create a shopping list based on the ingredients you need.
Organize Your List by Sections:
Group similar items together (e.g., produce, dairy, grains) to make grocery shopping more efficient.
Stick to your list to avoid impulse purchases that might derail your diet.
Choose Fresh, Whole Ingredients:
Opt for fresh vegetables, lean meats, whole grains, and minimally processed foods.
Stock up on healthy staples like olive oil, herbs, spices, nuts, and seeds that can enhance flavor without adding extra calories.
Step 4: Prep Your Ingredients Ahead of Time
Prepping ingredients ahead of time makes cooking quicker and easier, especially on busy days.
Set Aside Time for Prep:
Dedicate 1-2 hours each week (like on Sundays) to prep ingredients. Chop vegetables, marinate meats, cook grains, and portion snacks.
Store prepped ingredients in clear, labeled containers to keep your fridge organized and your meal prep efficient.
Batch Cooking:
Prepare large batches of certain foods (like grilled chicken, roasted vegetables, quinoa) that can be used in multiple meals throughout the week.
Store these in the refrigerator or freezer, so you always have a healthy base to build your meals around.
Step 5: Stock Your Kitchen with the Right Tools
Having the right kitchen tools makes cooking easier and more enjoyable.
Essential Tools:
Invest in a few key items like a sharp chef’s knife, cutting board, non-stick skillet, medium-sized pot, measuring cups and spoons, mixing bowls, and a baking sheet.
Consider a slow cooker or Instant Pot for easy, hands-off meals that can cook while you’re busy with other tasks.
Organize Your Kitchen:
Keep your kitchen tidy and organized, with frequently used tools and ingredients within easy reach. An organized space encourages cooking and makes the process less stressful.
Step 6: Learn Basic Cooking Techniques
Getting comfortable with basic cooking methods can make meal preparation faster and more efficient.
Master Simple Techniques:
Start with simple techniques like roasting, grilling, steaming, sautéing, and stir-frying.
Practice these techniques with easy recipes to build confidence. For example, learn how to roast vegetables, cook quinoa, or pan-sear chicken.
Experiment and Have Fun:
Don’t be afraid to experiment with spices, herbs, and different cooking methods. This helps make your meals more flavorful and satisfying.
Step 7: Start Small and Build Momentum
Ease into home cooking by starting with small, manageable steps.
Begin with One Meal a Day:
If you’re new to cooking, start with preparing just one meal a day, like breakfast or dinner. Gradually add more homemade meals as you become more comfortable.
Cook Once, Eat Twice:
Make larger portions so that you have leftovers for another meal. This is efficient and helps reduce the temptation to order takeout.
Step 8: Practice Mindful Eating
Cooking at home gives you a great opportunity to practice mindful eating, which can aid in weight loss.
Eat Slowly and Without Distractions:
Focus on enjoying your food by eating slowly, savoring each bite, and avoiding distractions like TV or your phone.
Pay attention to your hunger cues and stop eating when you feel comfortably full.
Plate Your Meals Mindfully:
Use smaller plates to help control portion sizes.
Serve your meals in the kitchen rather than at the table to avoid mindlessly reaching for seconds.
Step 9: Evaluate and Adjust
Regularly evaluate your cooking habits and make adjustments as needed.
Reflect on Your Progress:
At the end of each week, reflect on what worked well and what could be improved. Did you enjoy the recipes? Were the portions satisfying? Did you stay on track with your weight loss goals?
Make Adjustments:
Adjust your meal plan or cooking routine as needed. If you find certain recipes too time-consuming or ingredients too costly, simplify them or try alternatives.
Keep experimenting to find what works best for your lifestyle and preferences.
Step 10: Stay Consistent and Be Patient
Weight loss is a gradual process, and building a habit of cooking at home takes time.
Stay Consistent:
Commit to cooking at home regularly. The more you practice, the easier it becomes, and the more you’ll enjoy it.
Be Patient and Kind to Yourself:
Don’t be too hard on yourself if things don’t go perfectly. It’s okay to have setbacks or off days. What matters is getting back on track and maintaining a positive attitude.
Conclusion
Cooking your own meals is more than just a way to nourish your body, it’s a powerful tool for weight loss. By taking control of your ingredients, portion sizes, and cooking methods, you can create a balanced, nutritious diet that supports your health goals. With a little planning and creativity, you can enjoy delicious meals that help you slim down, all from the comfort of your own home.
Starting to cook at home for weight loss can feel overwhelming, but by following these steps, you’ll gradually build a habit that supports your goals. Remember, the key is to start small, stay consistent, and enjoy the process. Every meal you cook brings you one step closer to a healthier, leaner you.
Look for my healthy recipes included in the blog posts to gather few startting ideas.
I hope that you have enjoyed your journey.
If you would like to read more blog articles like this and enjoy preparing healthy meals subscribe to my mailing list and you will be notified as soomn as new post has arrived.
Reducing sugar intake is a key step towards a healthier diet, but that doesn’t mean you have to give up sweetness entirely. There are several natural and healthier sugar alternatives that can satisfy your sweet tooth without the negative effects of refined sugar. Below I am including three of the best options for healthy sugar alternatives
1. Stevia
What It Is: Stevia is a natural sweetener derived from the leaves of the Stevia rebaudiana plant, native to South America. It has been used for centuries by indigenous people and is now available in various forms, including liquid drops, powders, and granules.
Health Benefits:
Zero Calories: Stevia is calorie-free, making it an excellent choice for those looking to manage their weight or reduce calorie intake.
Blood Sugar-Friendly: Unlike refined sugar, stevia doesn’t cause a spike in blood sugar levels, making it a safe option for people with diabetes or those trying to maintain stable blood sugar.
Natural Origin: Being plant-based and natural, stevia is free from artificial ingredients and chemicals.
Rememeber, Stevia is much sweeter than sugar, so a little goes a long way. It can be used in beverages, baked goods, and various recipes, but it’s important to experiment with the amount to get the desired sweetness without overdoing it.
2. Honey
What It Is: Honey is a natural sweetener produced by bees from the nectar of flowers. It’s not only sweet but also packed with nutrients, antioxidants, and antimicrobial properties.
Health Benefits:
Rich in Antioxidants: Honey contains antioxidants like flavonoids and phenolic acids, which help protect the body from oxidative stress and inflammation.
Natural Energy Source: With its natural sugars, honey provides a quick source of energy, making it ideal for athletes or a quick pick-me-up.
Soothing Properties: Honey is often used to soothe sore throats and coughs, thanks to its antibacterial properties.
Good to know: Honey can be used in tea, spread on toast, or drizzled over yogurt and oatmeal. It’s sweeter than sugar, so you may need less of it. However, remember that honey is still high in calories and should be used in moderation. Honey is very good immunestimulator and could help you fight cold and fly the healthier way. Here is one of my favorite products : “Just Bee Lemon & Ginger Vitamin Honey” is a pure natural honey with vitamins for daily immune support with Vitamin D, C, B6, B12, Echinacea.
3. Maple Syrup
What It Is:Maple syrup is a natural sweetener made from the sap of sugar maple trees. It’s a popular alternative to sugar because of its rich flavor and nutrient content.
Health Benefits:
Mineral Content:Maple syrup is a good source of minerals like manganese and zinc, which are important for bone health and immune function.
Lower Glycemic Index: Maple syrup has a lower glycemic index than refined sugar, meaning it causes a slower rise in blood sugar levels.
Antioxidants: Like honey, maple syrup contains antioxidants that help fight inflammation and oxidative stress.
Do not forget: Maple syrup is a versatile sweetener that can be used in baking, cooking, or simply drizzled over pancakes, waffles, and desserts. Opt for pure, organic maple syrup to avoid additives and artificial sweeteners.
How to choose the Right Sweetener:
When it comes to sweetening your food and drinks, these three alternatives—stevia, honey, and maple syrup—offer healthier options compared to refined sugar. Each has its unique benefits and can be used in a variety of ways, so you can enjoy the sweetness while taking care of your health. Remember, even with healthier alternatives, moderation is key to maintaining a balanced diet. I hope that you found this information useful. I am recommending you read the post about , which one is more addictive Sugar or Coffee?
The debate between decaffeinated and caffeinated drinks is a common one, with various factors influencing personal preferences and health considerations. Both types of beverages have their pros and cons, and understanding these can help you make more informed choices. Here’s a detailed comparison:
Health Benefits and Drawbacks
Caffeinated Drinks
Benefits:
Increased Alertness and Energy: Caffeine is a natural stimulant that helps improve focus, concentration, and energy levels.
Enhanced Physical Performance: Caffeine can boost physical performance by increasing adrenaline levels and releasing fatty acids from fat tissues.
Antioxidants: Many caffeinated drinks, like coffee and tea, are rich in antioxidants, which can protect against cell damage and reduce the risk of certain diseases.
Drawbacks:
Anxiety and Restlessness: High caffeine intake can lead to jitteriness, anxiety, and restlessness.
Insomnia: Consuming caffeine late in the day can interfere with sleep patterns, causing difficulty in falling asleep.
Dependence and Withdrawal: Regular consumption can lead to caffeine dependence, and sudden cessation may result in withdrawal symptoms like headaches, fatigue, and irritability.
Decaffeinated Drinks
Benefits:
Reduced Anxiety and Better Sleep: Without the stimulating effects of caffeine, decaffeinated drinks are less likely to cause anxiety and sleep disturbances.
Fewer Withdrawal Symptoms: Decaffeinated beverages can be a good option for those looking to reduce caffeine intake without experiencing withdrawal symptoms.
Health Benefits Without the Jitters: Decaffeinated versions of coffee and tea still contain many of the beneficial antioxidants found in their caffeinated counterparts.
Drawbacks:
Lower Energy Boost: Decaffeinated drinks do not provide the same energy boost and increased alertness as caffeinated drinks.
Processing Concerns: Some methods of decaffeination use chemicals, which may be a concern for some people. However, many brands now use the Swiss Water Process, which is chemical-free.
Taste and Flavor
Caffeinated Drinks
Robust Flavor: Many people prefer the bold and rich flavors of caffeinated coffee and tea. The presence of caffeine can enhance the flavor profile of these beverages.
Variety: A wide range of caffeinated beverages is available, including different types of coffee, tea, energy drinks, and sodas, each offering unique flavors and experiences.
Decaffeinated Drinks
Milder Flavor: Decaffeinated drinks often have a milder flavor compared to their caffeinated versions. Some coffee enthusiasts find decaf coffee to lack the depth and complexity of regular coffee.
Availability: While options for decaffeinated beverages are increasing, the variety is still more limited compared to caffeinated drinks.
Situational Suitability
Caffeinated Drinks
Morning Boost: Ideal for a morning pick-me-up or during a mid-afternoon slump to increase alertness and productivity.
Pre-Workout: Often used as a pre-workout boost to enhance physical performance and endurance.
Decaffeinated Drinks
Evening and Nighttime: Perfect for enjoying in the evening or at night without disrupting sleep.
Health-Conscious Choices: Suitable for individuals who are sensitive to caffeine, pregnant women, or those with certain health conditions like hypertension.
The choice between decaffeinated and caffeinated drinks ultimately depends on individual preferences, lifestyle, and health considerations. Caffeinated drinks are great for an energy boost and enhanced focus, while decaffeinated options are better suited for relaxation and those sensitive to caffeine. Both have their own set of benefits and drawbacks, and incorporating a balance of both into your routine can help you enjoy the best of both worlds.
Summer is a season of sun, beach outings, and outdoor adventures. However, it can also bring challenges for maintaining healthy hair. The sun’s rays, salty sea water, and chlorine from pools can wreak havoc on your tresses, leaving them dry, frizzy, and lifeless. But fear not! Nature offers a bounty of remedies to keep your hair looking its best, and one standout herb is rosemary. Read about six natural benefits Rosemary can give your hair during Summer.
The Benefits of Rosemary for Hair
Rosemary (Rosmarinus officinalis) is more than just a culinary herb. It’s been used for centuries in traditional medicine and beauty rituals, thanks to its potent properties. Here’s why rosemary is a must-have in your summer hair care routine:
Promotes Hair Growth: Rosemary oil is known to improve circulation to the scalp, stimulating hair follicles and encouraging growth.It improves circulation to the scalp, which ensures that hair follicles receive the nutrients they need to grow. This is especially important in summer, when hair can become stressed by environmental factors.
Strengthens Hair: The antioxidants in rosemary help strengthen hair strands, making them more resilient to the damage caused by UV rays, heat, and pollutants. This can reduce breakage and split ends, keeping your hair looking healthy and vibrant.
Prevents Dandruff: The antimicrobial properties of rosemary help in treating dandruff and dry scalp, ensuring your hair stays flake-free even in the hot, humid weather.
Adds Shine and Softness: Rosemary helps to condition the hair naturally, adding a healthy shine and softness. It can also prevent hair breakage and split ends, common issues during the summer.
Protects Against Damage: Rich in antioxidants, rosemary protects hair from damage caused by free radicals and environmental factors, such as UV rays and pollution.
Balances Oil Production: The heat and humidity of summer can lead to oily scalp conditions, but rosemary helps balance sebum production, keeping your scalp healthy without making your hair greasy.
Enhances Shine and Luster: Rosemary’s natural oils can enhance the shine of your hair, giving it a glossy finish that looks especially beautiful under the
summer sun.
How to Use Rosemary for Hair Care in Summer?
1. Rosemary Hair Rinse
Ingredients: A handful of fresh rosemary sprigs (or 2 tablespoons of dried rosemary) and 2 cups of water.
Instructions: Boil the water and add the rosemary. Let it steep for about 15-20 minutes, then strain the liquid and allow it to cool. Use this rosemary water as a final rinse after shampooing to boost shine and strength.
Instructions: Place the rosemary in a jar and cover it with the oil. Let it sit in a warm, dark place for at least two weeks, shaking occasionally. Strain the oil and apply it to your scalp and hair, massaging gently to stimulate circulation. Leave it on for at least 30 minutes before washing it out.
Additionally, you can combine Rosemary and Apple Cider Vinegar to naturally remedy your hair and Body for Summer
Apple cider vinegar (ACV) is another powerhouse ingredient for hair care, especially in summer. It helps balance the scalp’s pH, reduces frizz, and adds shine. When combined with rosemary, ACV can provide comprehensive protection and nourishment for your hair.
Rosemary and Apple Cider Vinegar Hair Rinse
Ingredients:
1 cup of water
1/4 cup of apple cider vinegar
1/4 cup of rosemary water (from the rinse recipe above)
Instructions:
Mix the rosemary water and apple cider vinegar with the water.
After shampooing, pour this mixture over your hair, making sure to cover your scalp and strands.
Massage it into your scalp for a minute, then leave it on for another 2-3 minutes.
Rinse with cool water to seal the hair cuticles and lock in moisture.
This rinse not only helps cleanse the scalp and remove product buildup but also leaves your hair smooth and shiny, perfect for summer outings. You might also like to read about other natural benefits of apple cider vinegar.
To summ up, Rosemary is a versatile herb that offers a myriad of benefits for hair, particularly during the summer when your hair needs extra care. By incorporating rosemary into your hair care routine, you can promote growth, prevent damage, and maintain a healthy, balanced scalp. When combined with apple cider vinegar, rosemary’s benefits are amplified, giving you a natural, effective way to keep your hair looking its best all summer long.
Below I have a few recommendations of a ready products or others to help you prepare your natural remedies:
To provide the best experiences, we use technologies like cookies to store and/or access device information. Consenting to these technologies will allow us to process data such as browsing behaviour or unique IDs on this site. Not consenting or withdrawing consent, may adversely affect certain features and functions.
Functional
Always active
The technical storage or access is strictly necessary for the legitimate purpose of enabling the use of a specific service explicitly requested by the subscriber or user, or for the sole purpose of carrying out the transmission of a communication over an electronic communications network.
Preferences
The technical storage or access is necessary for the legitimate purpose of storing preferences that are not requested by the subscriber or user.
Statistics
The technical storage or access that is used exclusively for statistical purposes.The technical storage or access that is used exclusively for anonymous statistical purposes. Without a subpoena, voluntary compliance on the part of your Internet Service Provider, or additional records from a third party, information stored or retrieved for this purpose alone cannot usually be used to identify you.
Marketing
The technical storage or access is required to create user profiles to send advertising, or to track the user on a website or across several websites for similar marketing purposes.